There’s a process where a licensed electrician replaces breakers, upgrades service, and verifies wiring while you must ensure power is off since shock and fire risks exist; you finish with greater capacity and improved safety.
Key Takeaways:
- A licensed electrician inspects the existing service, obtains permits if required, and decides whether a simple panel swap or a service amperage upgrade (for example, 60A to 200A) is needed.
- Power is shut off, the old panel is removed, grounding and neutral connections are upgraded as needed, the new panel is mounted, breakers are installed, and each circuit is transferred and clearly labeled.
- Power is restored only after wiring checks; the electrician and a local inspector perform load and safety tests (including GFCI/AFCI where required) and close out the permit once code compliance is confirmed.
Initial Assessment and Load Calculation
Assessment begins with a panel inspection and circuit mapping so you and the technician spot overloads and damaged wiring; the load calculation then quantifies current usage to guide safe upgrades and avoid fire risks.
Evaluating current energy consumption
Review of your bills and appliance ratings reveals peak draws; you identify high-demand circuits and estimate daily consumption to inform safe panel sizing and prevent overload.
Determining necessary amperage for future growth
Calculating required amperage considers current load plus anticipated additions so you choose a capacity that supports new appliances and future growth without risking trips.
Estimate baseline and peak loads by totaling circuit loads and applying demand factors so you capture simultaneous use. Include heavy items like HVAC, electric vehicle chargers, and planned kitchen upgrades to see if you need 200A or higher service. Consult a licensed electrician to apply code rules, add a safety margin, and secure permits to reduce fire and shock risk.
Permitting and Utility Coordination
Permitting requires you to secure municipal approval, arrange inspections, and plan for a timed outage with the utility; expect permit fees, waiting periods, and mandatory safety inspections.
Securing municipal electrical permits
You will submit plans, pay fees, and schedule an inspector; incomplete applications can delay your upgrade and may lead to stop-work orders if work proceeds without authorization.
Scheduling power disconnects with the utility provider
Contact the utility early to set a planned outage, confirm lockout/tagout procedures, and note any service interruption timelines so your project stays on schedule.
Scheduling the disconnect with your utility often requires submitting a written request, providing site details, and coordinating a specific outage window; you should confirm whether the utility will perform the isolation or if a certified technician from your side must be present. Expect required lockout/tagout procedures, potential fees, and safety clearances. Keep a copy of the utility’s written disconnect authorization to protect against liability and avoid unauthorized re-energizing.
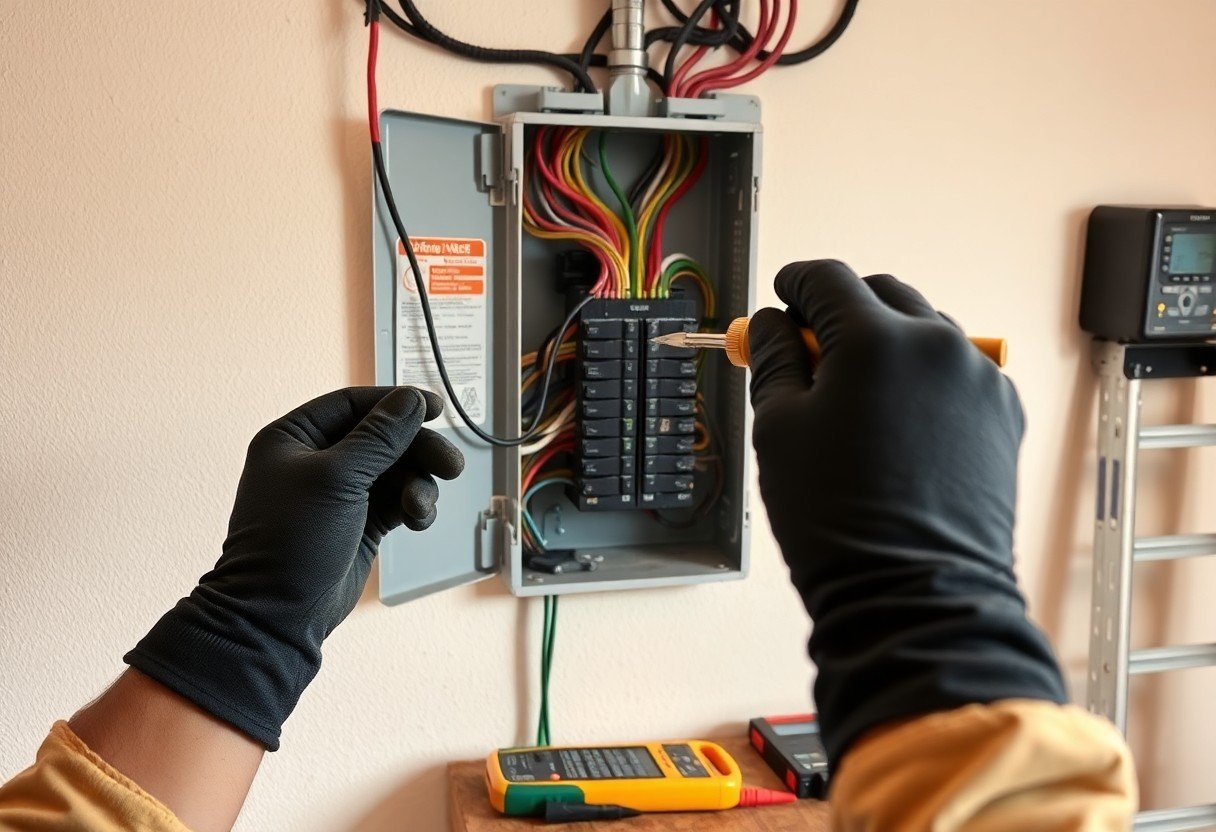
Removal of the Obsolete Panel
Panel removal begins after you confirm service is shut off and the meter disconnected, then you unlatch the old enclosure, disconnect neutrals and grounds, and clear the workspace for the new installation.
Disconnecting branch circuits and service entrance wires
Before you touch conductors, shut off main power and verify de-energized circuits with a voltage tester; label and photograph each branch to keep circuits organized.
Extracting the legacy enclosure and outdated components
Carefully you remove the old box, breakers, and fuses, watching for sharp metal edges and corroded connections, and you set aside components for inspection or disposal.
When you unbolt the enclosure, support its weight and have an assistant if needed to avoid strain or sudden drops. You inspect the interior for burn marks, brittle insulation, and loose lugs, and use insulated tools to separate remaining conductors. You arrange proper recycling or hazardous-waste disposal for corroded or contaminated parts per local code.
Mounting and Grounding the New System
Panel placement requires secure mounting to studs and correct grounding to protect you and the property; attach to structure, seal around conduit, and ensure proper equipment grounding to reduce shock and fire risk.
Installing the upgraded panelboard enclosure
Mounting the enclosure requires level alignment, secure fasteners, and clearances per code; you must avoid compressing wires and leave access for breakers and maintenance to prevent electrical hazards.
Enhancing grounding electrodes and bonding systems
Bonding upgrades connect your panel to grounding electrodes and ensure all metal systems are tied together; confirm continuous conductor connections and correct electrode sizing to minimize step and touch shock.
You should install properly sized grounding electrodes-such as driven rods or grounding plates-bonded with continuous, corrosion-resistant conductors; test earth resistance, verify clamps and paint-free connections, and separate neutral and equipment grounding conductors where code requires, since poor bonds create dangerous shock paths.
Wiring and Circuit Integration
You re-route feeders, connect new bus bars, verify grounding and bonding, balance ampacity, and label circuits to reduce overload and fire risk and ensure the panel accepts the new load.
Organizing branch circuits for optimal heat dissipation
Balancing branch circuits, you spread high-load lines across phases, avoid bundling heat-producing cables, and maintain breaker spacing to promote proper ventilation and limit overheating on the bus and conductors.
Installing AFCI, GFCI, and standard circuit breakers
Installing AFCI, GFCI, and standard breakers, you place devices per code locations, test trip operation, and ensure breakers match the panel’s amperage and bus type to provide arc and shock protection.
AFCIs must protect living spaces like bedrooms and family rooms, while GFCIs go on circuits serving bathrooms, kitchens, garages, and outdoors; you should confirm breaker compatibility with the panel, torque terminations to manufacturer specs, test trip functions, label each circuit, and rely on a licensed electrician to prevent loose-neutral arcs and electrocution hazards.
System Testing and Inspection
You observe technicians test the panel, measuring voltages, verifying grounding and checking breakers for high voltage hazards; they document load balance and isolate any faults before proceeding.
Verifying voltage levels and circuit integrity
When you verify voltage levels, you read phase-to-phase and phase-to-neutral values, inspect neutral-ground separation and test breakers so any abnormal reading triggers immediate isolation to avoid shock or fire risks.
Final walkthrough and municipal code compliance approval
Expect the inspector to review labeling, clearances, wiring methods and grounding, compare work to local code, and only issue approval after confirming adherence; lack of compliance can force corrections and delay project completion.
After the walkthrough, you receive a stamped inspection report detailing required corrections, confirmation of AFCI/GFCI operation and final permit sign-off; keep this documentation for insurance and resale proof of compliant work.
To wrap up
Summing up, you hire a licensed electrician who disconnects power, replaces or upgrades the panel, installs new breakers and grounding, tests circuits, and restores service while ensuring code compliance and clear labeling so your home handles modern loads safely.